Monday 21 November 2005

Project - CNC Mill Bearing Blocks Part II

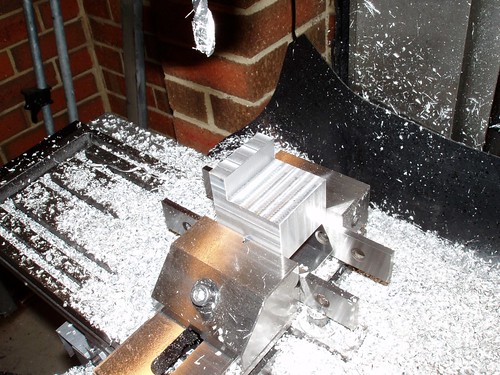
Back on the mill registering the plates to size.


200906291209.jpg


Here are the blanks.


200906291209.jpg


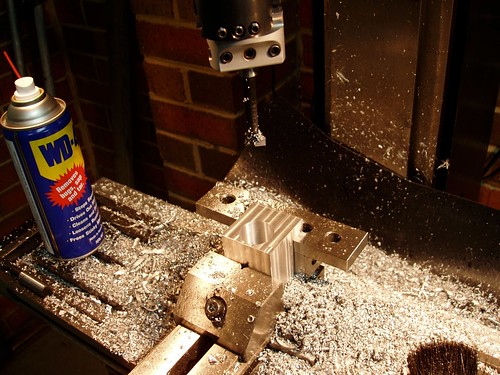
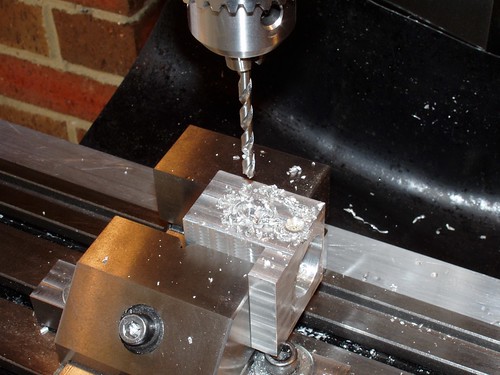
Find the center, drill with a 12mm drill


200906291209.jpg


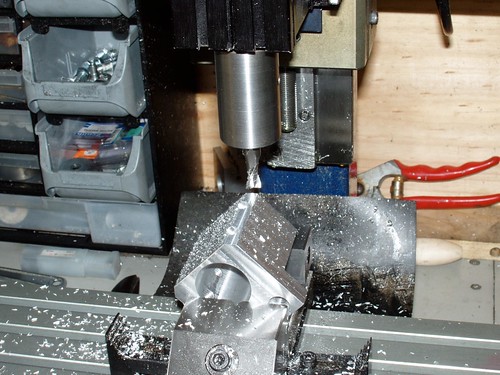
Now bore out to clear the lock nut for the ballscrew


200906291210.jpg


Here I am using a bit of old scrap (one of the scrapped parts of my Steam Engine project). I have milled a register and drilled and tapped a hole in the center to mount the part. This way, I only have to set zero on the DRO once and I can drill and counterbore all three plates identically.


200906291210.jpg


Here is one of the keep plates mounted in the jig - I have just finished drilling all the holes.


200906291211.jpg


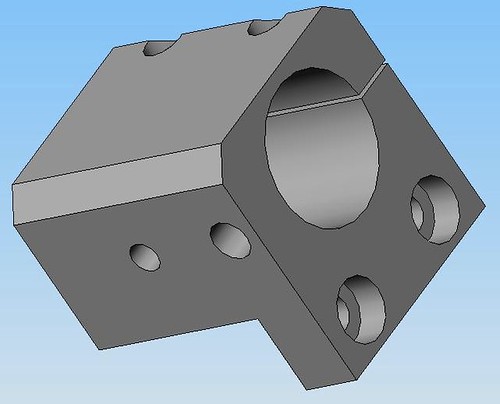
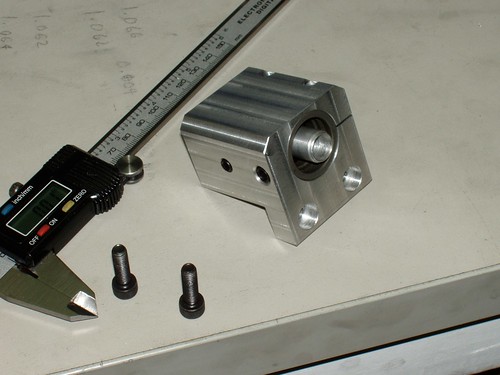
The housings and keep plates are complete.   I now need to make a spacer ring to keep the center races of the two bearings apart.


200906291211.jpg


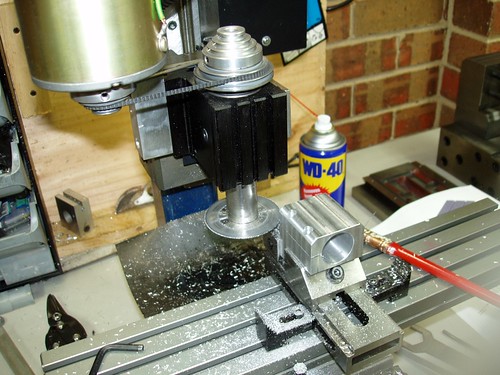
Here I have turned the locating spigot off of my stub mandrel that I used to hold the housings for turning.  I have also drilled a 12mm hole 20mm deep in preparation for boring out to 18mm.


200906291212.jpg


Parting off a spacer ring.


200906291212.jpg  


Assembly - Bearing goes in, followed by space ring, then followed by another bearing....


200906291212.jpg


The keep plates are then screwed on with M4 SHCS.


200906291213.jpg

Monday 14 November 2005

Project - CNC Mill Bearing Blocks Part I

The bearing blocks are what we mount the bearings in to stop axial play in the ballscrew. We need one for each axis.


200906291200.jpg


You can buy them, but they are mega expensive. I bought some angular contact bearings from eBay and decided to make my own blocks.


The blocks contain two opposing angular contact bearings separated by a small spacer - this allows them to be preloaded to stop axial play in the ballscrew.


Drawings can be found here.


I cut some rough size blocks on the bandsaw and I am facing them to size in the mill.


200906291201.jpg


Heres what one looks like after it has been bored for the bearings on the lathe and faced to length. I am getting ready to drill the mounting holes and the holes for the bearing keep plate that screws to the front.


200906291201.jpg


Finding the edges with an edge finder.


200906291202.jpg


Holes drilled.


PA130044.JPG


Back on to the lathe now - part is mounted on a stub mandrel for turning away the bits that don't look like a bearing block.


200906291203.jpg


One down - two to go...


200906291203.jpg


Stay tuned for the keep plates and final assembly.

Wednesday 9 November 2005

Project - CNC Mill Ballnut Carriers

Isel ballnuts look like this:


IselBallnut


So we need a carrier block for them. The carrier block needs to do two things:


  • Hold the ball nut so there is no axial or rotational play

  • Provide a means to take advantage of the ballnut's adjustable preload feature


Blocks for these ballnuts are available from Isel, but neither configuration was suitable due to space constraints. I decided to design my own.


IselBallnutCarrier


As you can see, the block is split with holes for two clamp screws. The larger of the two holes along the side is for a locating screw that mates with a hole on the side of the ball nut to stop axial play, the smaller of the two is a clamp screw that bears on the side of the ball nut and when tightened squeezes the ball nut slightly so that the nut can be preloaded. The other two counterbored holes at the front are simply mounting holes.


Block after milling to size and milling out recess.


http://farm6.static.flickr.com/5140/5541876329_7ac72ec938.jpg


Now we flip it over and bore it. The ballnut is 28mm in diameter so I am aiming for 28.00 -0/+0.04.   I use WD-40 for cutting aluminium - works the same as kerosene, just dosen't smell as bad.


http://farm6.static.flickr.com/5132/5542456738_c25287aabd.jpg


Drilling the holes for the locating screw and the preload adjust screw


http://farm6.static.flickr.com/5058/5541876867_bb23301c58.jpg


Counterboring the mounting holes.


http://farm6.static.flickr.com/5175/5541877173_a7ff2f892c.jpg


Just to prove I still use the Taig - here I am adding the chamfer along the sides.


http://farm6.static.flickr.com/5099/5542457656_2c2be3bf8b.jpg


Taig is also used for slitting the block.


http://farm6.static.flickr.com/5011/5542457934_b84856e164.jpg


All done! Assembled with ballnut.


http://farm6.static.flickr.com/5019/5541877937_7599ec8f1d.jpg