Tuesday, 8 June 2004

Project - Colliery Steam Engine Flywheel

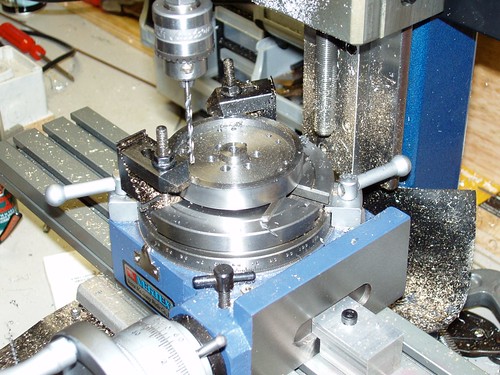
Fiddly, fiddly - Rotary table is centered under spindle and then flywheel is clamped to rotary table after itself being centered to the rotary table. First time I've done this - about 40 mins with a DTI.


I need to turn a morse taper plug with a spigot for doing this sort of thing.


Once everything was centered Y axis offset by the prescribed amount and the inner holes were drilled, then offset again to drill the outer holes.


http://farm6.static.flickr.com/5095/5540876455_a7945ac0a4.jpg


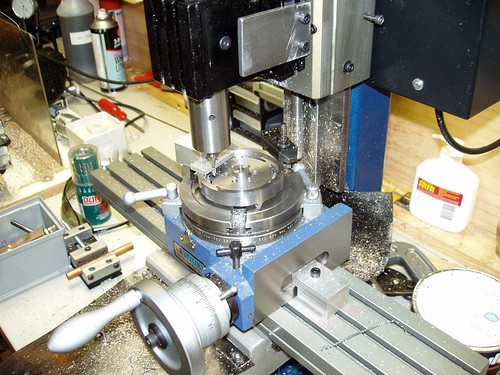
Once the holes were drilled without disturbing the setup, the relevant bits that aren't spokes are milled out. This shot shows the outer radii being slotted.
The astute will see that the clamping setup has changed - I had to remove one of the step clamps because the stud was fouling the end mill holder. I was able to change one of the clamps over without disturbing the setup too much - I am not working to tenths here. Chalk up another mistake to experience - Make sure your clamping setup will not foul the tool path!

http://farm6.static.flickr.com/5019/5540873081_f1edebf640.jpg

Sunday, 2 May 2004

Project - Colliery Steam Engine Progress

Progress!


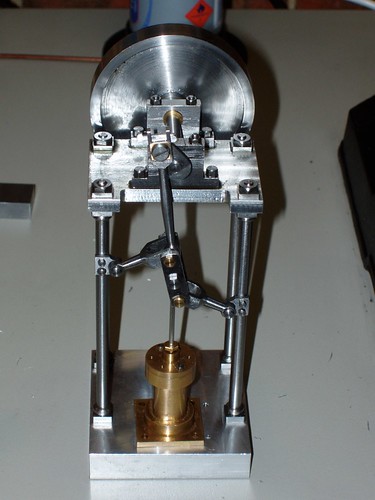
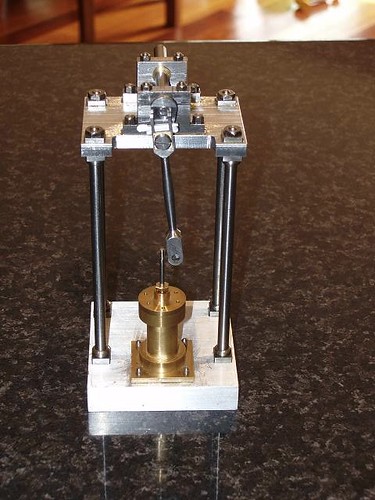
  • Flywheel has been cut - still have to cut the spokes

  • Parallel crosshead motion is complete

  • Baseplate (second one) is scrap, holes in the wrong place - have to make another one

  • Still have steam chest, valvegear and eccentric and strap to do

  • After that - lots of cleanup and polishing. Some parts still have machining marks on them


http://farm6.static.flickr.com/5173/5541447354_c16ccbccae.jpg

Tuesday, 20 April 2004

Project - Colliery Steam Engine Started

Based on one of Elmer's designs my first crack at something that isn't a tool or accessory for the lathe etc


This engine is completely scratch built from barstock without the use of castings. There are also no drawings besides the design the engine is based on so things are a bit "fit and see".


Here is a photo of progress:


  • I have the table, crankshaft and bearings and the connecting rod finished

  • Also have completed the cylinder


Pic 017