Saturday 28 November 2009

Forming boiler end plates

I was asked a question recently (at Home Model Engine Machinist) on how the end plates for the boiler currently under construction were formed.


Copper is a malleable material an it annealed state and this means that it can be beaten into shape around a former. During the forming process it work hardens and needs to be annealed again. You can tell when annealing is required because the sound of striking it changes and it stops being easily worked.


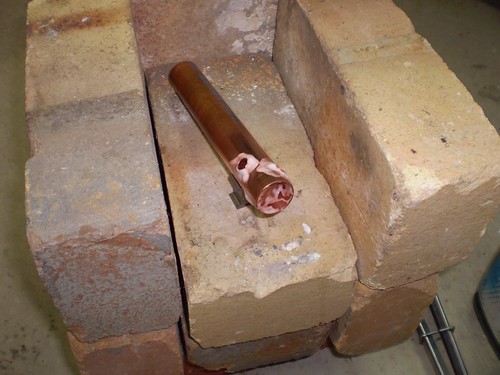
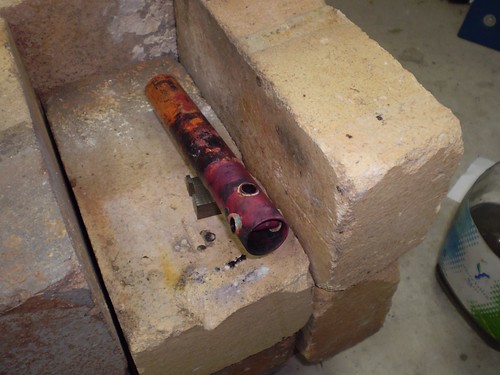
Annealing copper in the home shop is pretty easy - I just place it in the hearth (a bunch of fire bricks in the middle of the floor) and heat until dark red hot with a torch. You can leave it to cool in air or quench it - I quench it because I have no patience - the point being that it is the heating that anneals not the way it is cooled.


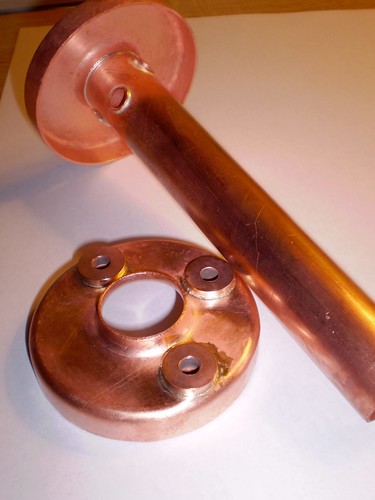
To shape the copper, you'll need a former; something over which you will hammer the copper. For boiler end plates, I use aluminium. Here are the formers for the 3" vertical boiler fire-tube endplates.


P2130035 copy


They were turned in the lathe and the diameter is the inside diameter of the boiler shell less twice the thickness of the tube plate. The hole through the middle is calculated in a similar way.


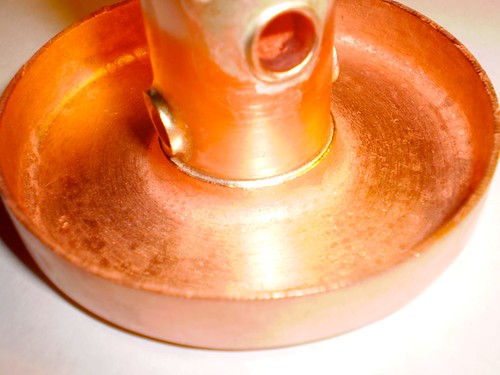
The outer flange is formed by clamping the annealed tube plate between the two formers a beating the copper with a soft faced hammer. Here is is this process illustrated using formers for the end cap of a small butane gas tank. Some people use a vice, but for smaller plates, a substantial G-clamp can be used.


http://farm6.static.flickr.com/5089/5345590698_2a4d924567.jpg


For the central flange in the 3" boiler, the formers and the steel piece you see sitting in the central hole of the rightmost former in the photo above are turned into dies. The plate is formed by forcing the steel piece through gently (I had to stop and anneal a couple of times) using a large vice.

More Boiler Progress

I have another couple of shots of progress on the boiler. The first is the bottom tube plate and the fire-tube after soldering and pickling.


http://farm6.static.flickr.com/5010/5345600252_5ba2912bbc.jpg


There is a nice fillet of solder at all joints which is what I was aiming for. The citric acid pickle also cleans all the gunk off very effectively such that all that is required is a rub with a scotch brite or wire wool under running water once the job comes out of the bath.


Here is another shot showing the top tube plate with all the bushes soldered in.


PB260003


Here is the underside of the top tube plate:


http://farm6.static.flickr.com/5047/5344990833_acb8fb19bb.jpg

Monday 23 November 2009

A Boiler for the new engine

It's been a while since the last post and now that I have the workshop back up and running again after getting the new lathe and mill operational, I though I would get back to some steam.


I am going to make a steam plant for the new engine so the first thing I need is a boiler. I am going to re-use the design from the last boiler I made, but I am going to skip the superheater and use cross tubes at the bottom of the fire-tube instead. The design is a simple centre flue fire-tube boiler which I will fire with butane gas.


You can see here all the basic bits:


http://farm6.static.flickr.com/5244/5344995045_9b49f14f7a.jpg


The main shell is 75mm is diameter and the two flanged ends are 1.6mm in thickness (3" and 1/16" respectively for our American cousins). The fire-tube is 25mm in diameter and about 185mm long. The cross tubes are 10mm in diameter and are arranged at 90 degrees across the fire-tube. They have a slight incline so that they are not horizontal. The bushes are bronze (never use brass in a boiler!!) and threaded 1/4"-40 ME.


The first task is to silver solder the cross tubes into the fire-tube.


http://farm6.static.flickr.com/5123/5344995351_c9e990b1b6.jpg


Here it all is assembled and fluxed, ready for heat. Here is the result after soldering is complete:


http://farm6.static.flickr.com/5206/5345607310_b7587695ea.jpg


This then goes into the citric acid bath I have in the plastic container to pickle overnight. This will remove all the oxidation and mess. It will come out of the bath all clean and ready for the next stage.